Connecting your Yamaha LS9 to the Stagemix iPad Application
The Yamaha LS9 Console can be wirelessly controlled via an Apple iPad using the Stagemix application.
Wireless control can free up scarce real estate at FOH, make it easier to EQ and mix monitors, and offers a host of other benefits.
However, correct configuration of all the network and gear settings can be tricky.
To make this process easier, here are step-by-step instructions for connecting your LS9 console to your Apple iPad.
Connecting the Yamaha LS9 to the Stagemix iPad app is done in 3 phases. The first phase is connecting the LS9 to a wireless router and establishing a wireless connection with the iPad. The second phase is setting up the network settings on the LS9. The final phase is setting up the StageMix app to connect with your LS9 console.
You can share this guide by sharing the link (tcfurlong.com/ls9stagemix),
or by printing and affixing this QR Code next to your console.
Phase 1: Connecting the LS9 to a Wireless Router and Establishing a Wireless Connection With the iPad
The entire process of connecting an iPad to your LS9 console requires a wireless network.
In order to create one, you will need a wireless router connected to the LS9.
Figure 1 below displays the port used to connect an LS9 console to a wireless router.
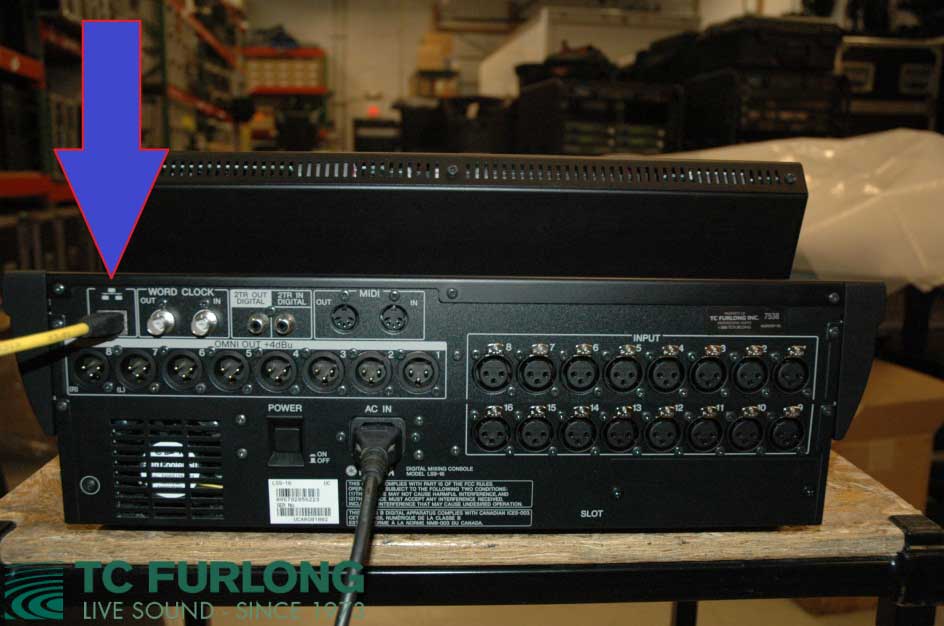 Figure 1
In order to properly set up a wireless network, you will have to refer to the specific instructions for your router. This process will vary from router to router.
Once the network is set up, you will need to connect you iPad to that wireless network.
 Figure 2
Enter “Settings” on the iPad and select the “Wi-Fi” tab in the right hand column.
Find the network that you have set up listed in the “Choose a Network” section. Select it. Depending on how you have chosen to set up your wireless network, you may have to enter the password that you designated.
Once you have joined the network, tap the little blue arrow that is next to its name. This will bring up a detailed menu and information for that specific network.
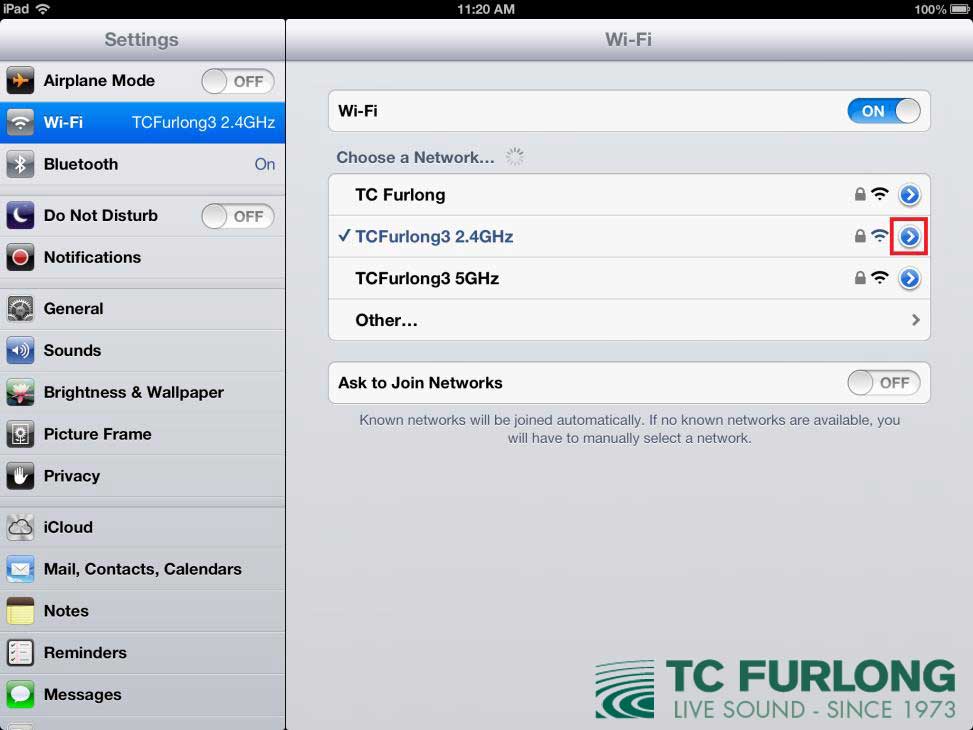 Figure 3
Write down the IP Address—you will need it later. Be sure the Subnet mask remains 255.255.255.0.
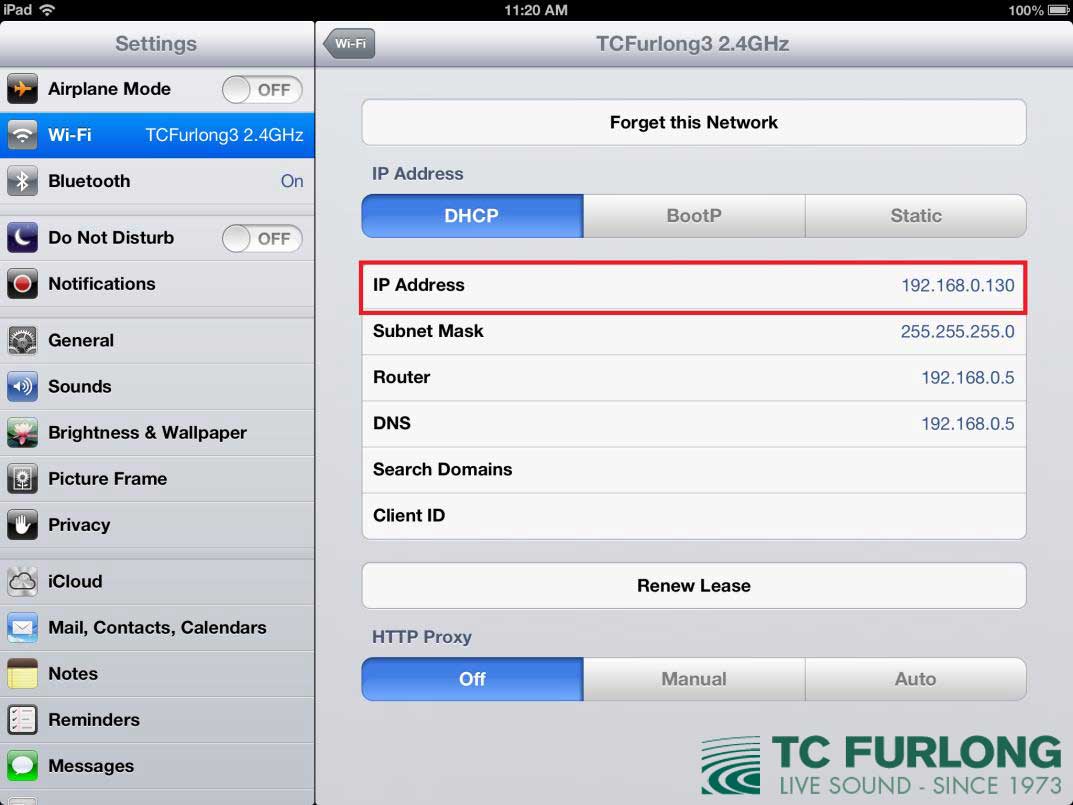 Figure 4
Phase 2: Setting Up the Network Settings on the LS9
Once your LS9 is powered on and connected to your wireless router, find the “Setup” button on the left hand side of the LS9 screen, as seen in Figure 5. Press the button until the screen toggles to the “Misc. Setup” page.
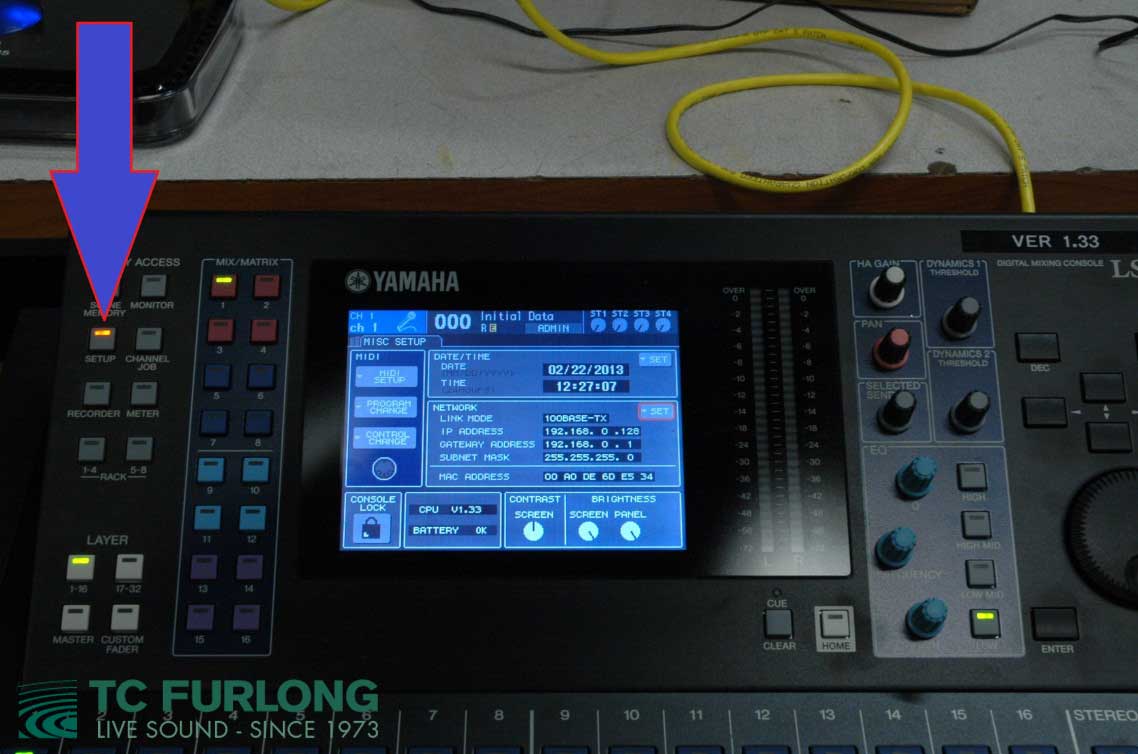 Figure 5
Use the controls on the right side of the screen to select the “Set” button in the “Network” box. This will allow you to change the IP and Gateway Addresses.
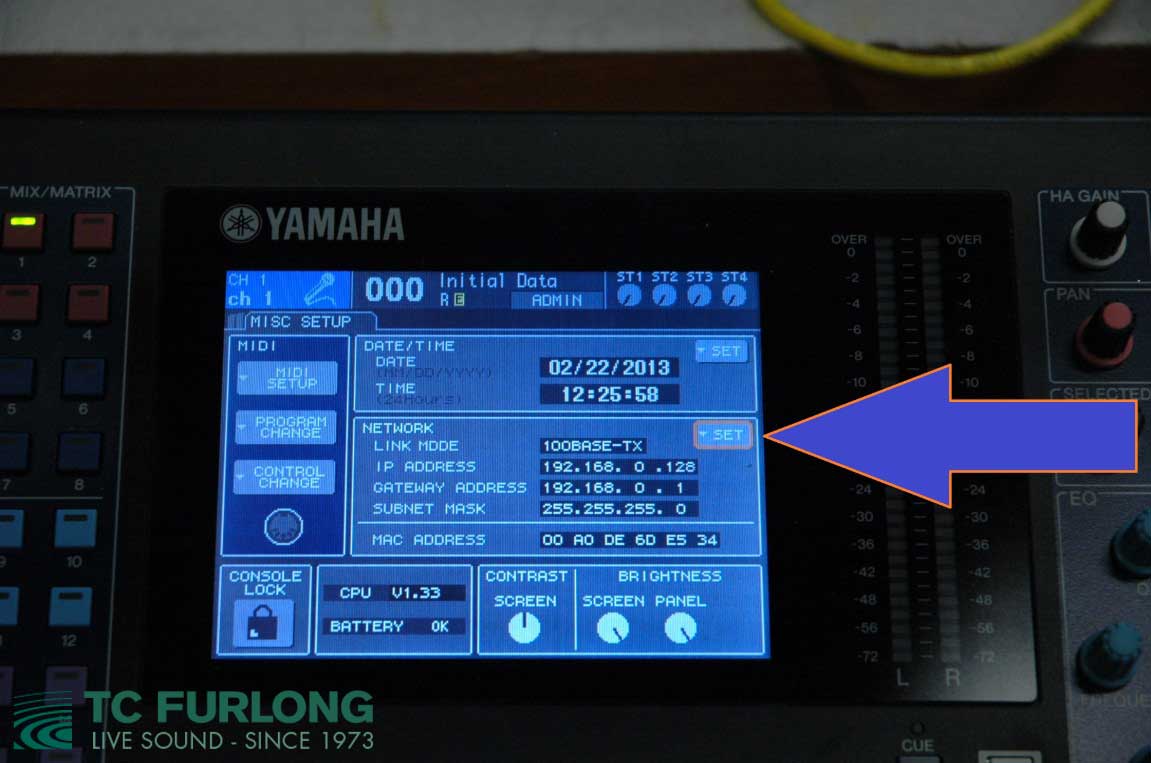 Figure 6
At this point you’ll verify that the IP Address is going to work on this network.
In order for the IP address of your LS9 to function correctly on this network, the first three sets of numbers must be identical to the IP address that you found on your iPad.
If they are different, you will need to change them. If you change the IP address at all, you will most likely have to change the Gateway Address’s first three sets of numbers to mimic those of the IP address. If you do not do this, the LS9 will not allow you to save your changed IP address.
Of the 4 sets of numbers, the first 3 sets must match those on the iPad. The 4th set of numbers in all three places— iPad, LS9, and Gateway Address—must be unique. Most often, they will default to numbers that will be different, but in a case where they are identical, changing the LS9’s last set in its IP to any number between 0 and 200 should work.
Once you have all of this information set, take down the IP address that you chose for the LS9—you will need it later.
Here is an example of IP and Gateway Addresses that would function properly:
- iPad IP Address: 192.168.0.130
- LS9 IP Access: 192.168.0.128
- LS9 Gateway Address: 192.168.0.0
The last piece of information that you will need from the “Misc Setup” page is the “Mac Address.” Take this number down—you will need it later.
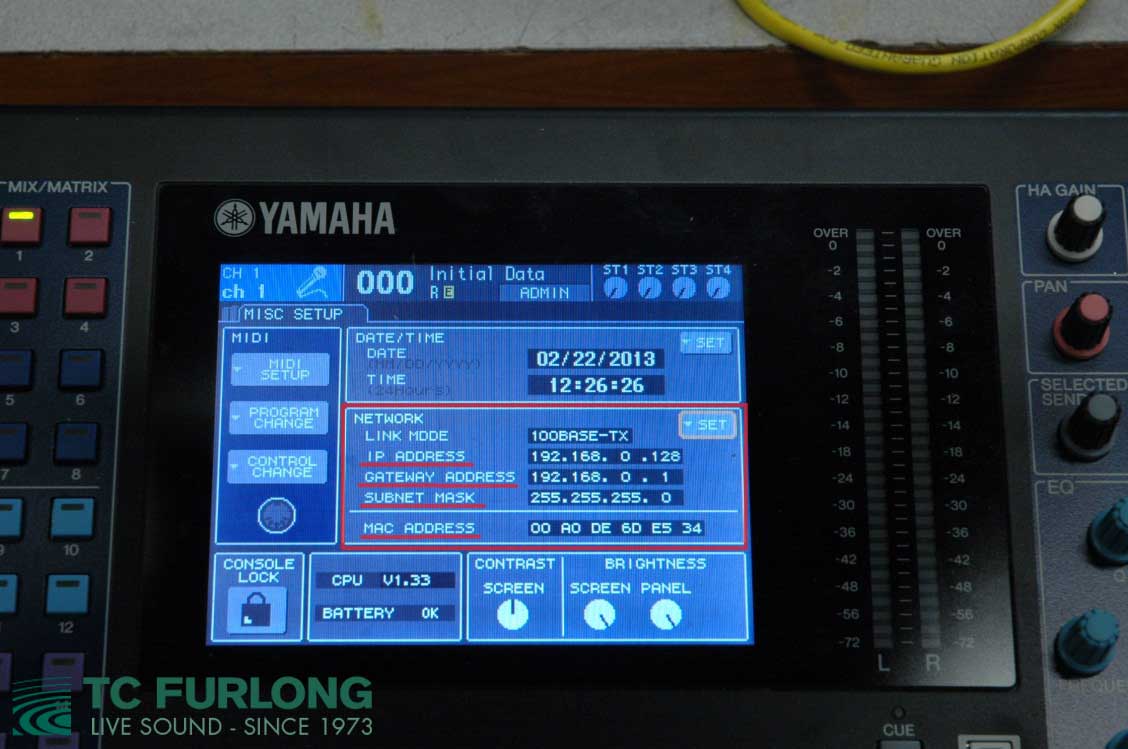 Figure 7
Phase 3: Setting up the StageMix App to Connect With Your LS9 Console
If you have not installed the most recent version of the StageMix LS9 App, install it now. Once it is installed and open, press the “Add Mixer” button as seen in Figure 8.
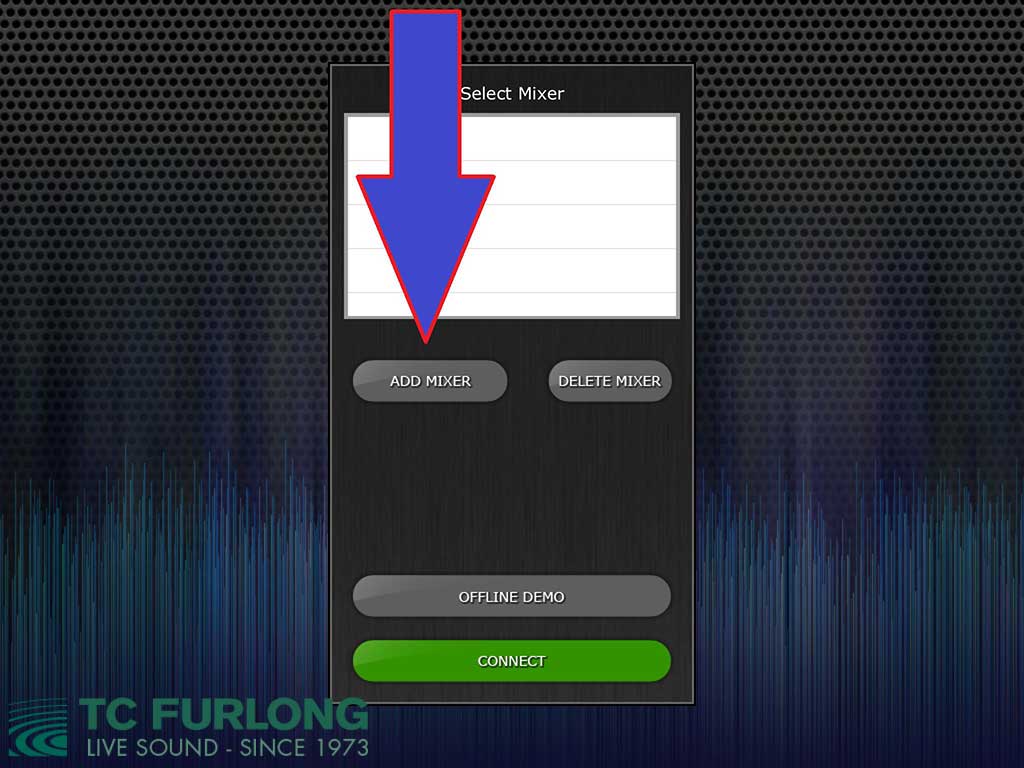 Figure 8
The app will then ask you to enter some information about your LS9.
You will need to name it (the name can be arbitrary), enter the IP Address of your LS9, enter the MAC Address of your LS9, and choose the model of your LS9 (-16 or -32).
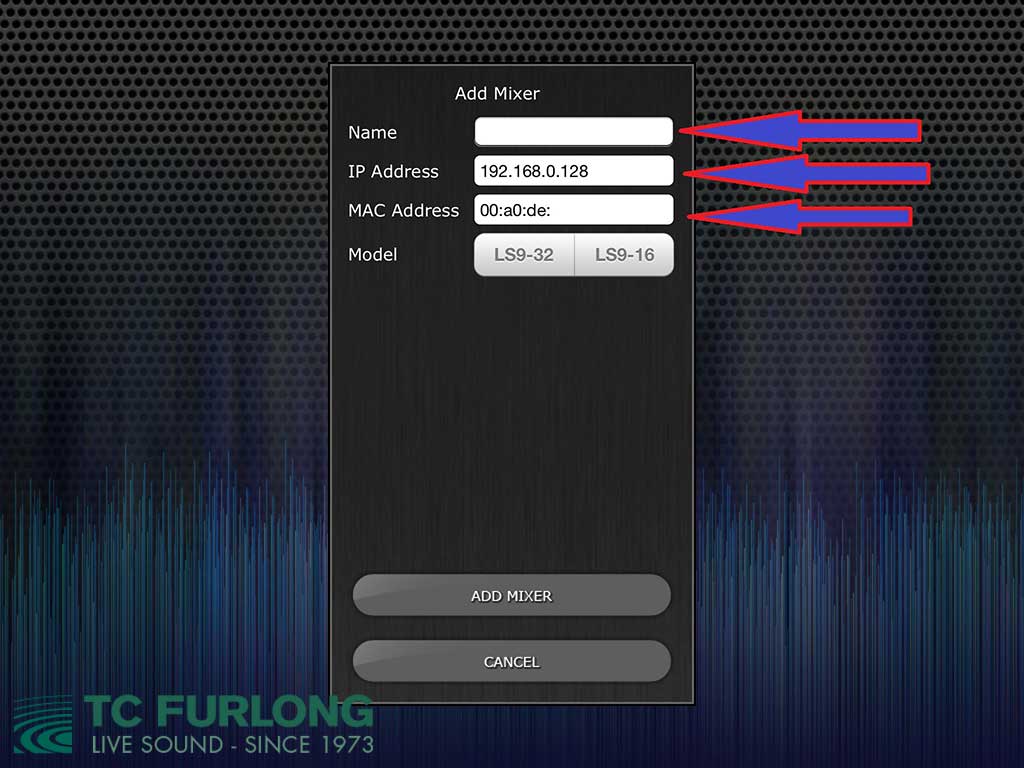 Figure 9
Figure 10 shows the completed Add Mixer screen, based on the settings we recorded earlier.
 Figure 10
Tap the “Add Mixer” button at the bottom. You will see that your console is now listed in the “Select Mixer” list.
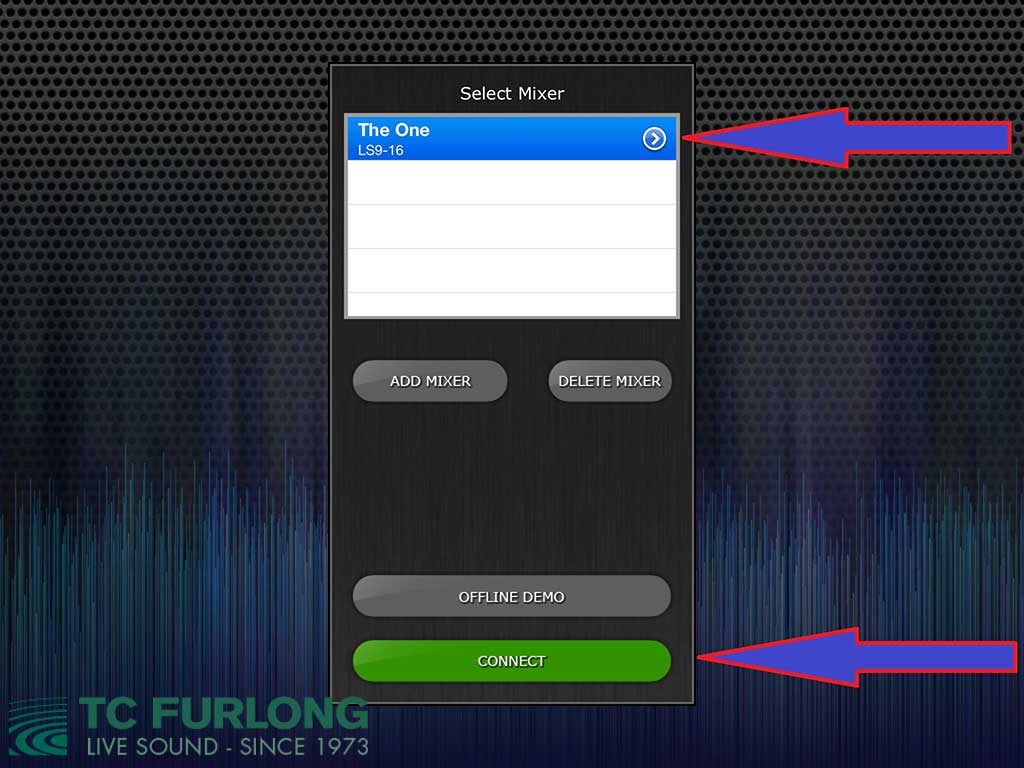 Figure 11
Once you select the mixer, press “Connect.” If every step has been completed correctly, you should see a set of faders like the ones in Figure 12.
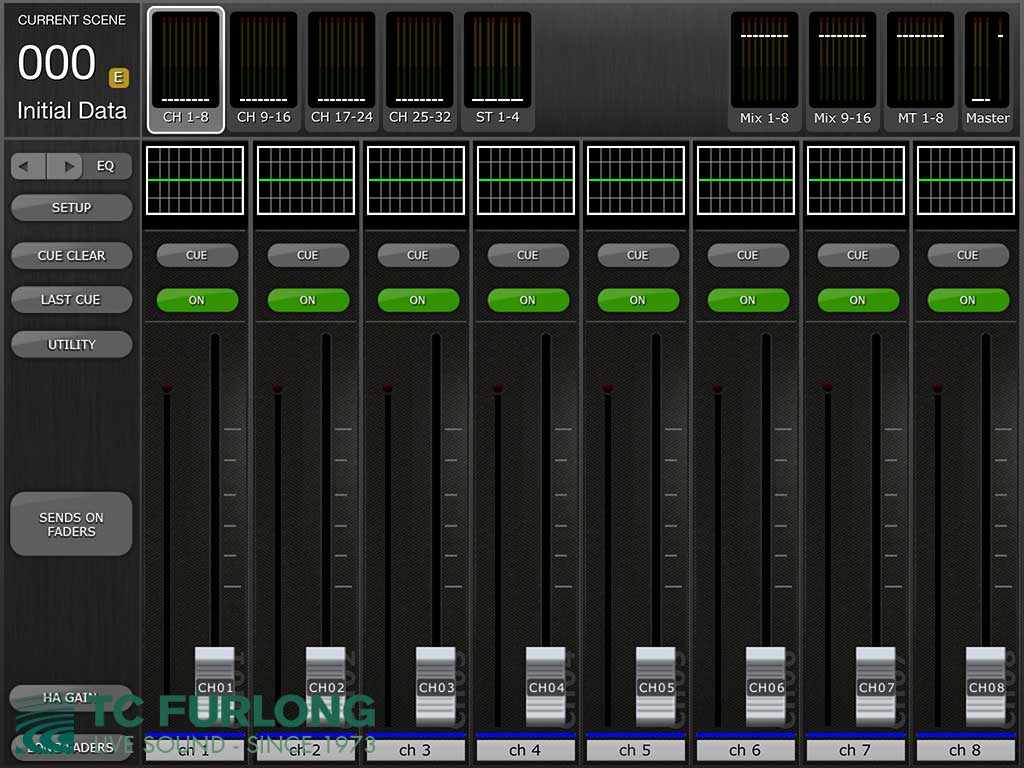 Figure 12
Congratulations! Your iPad is now wirelessly connected to your LS9 Mixer!
Was this article helpful? Click here to sign up for the TC Furlong Newsletter![]()