by Steve Whittenhall
Live multitrack recording used to be a complicated task, relying on 2- or 3-way splitters and racks of mic preamps and A/D converters. With the advent of digital mixing consoles and digital audio networking protocols (like Dante), much of this process has been simplified.
Yamaha CL and QL series consoles have the capability of integrating with the Steinburg Nuendo Live software. Although the software connects directly to your existing Dante network, the setup is not intuitive. Here, we will lead you through the basic steps for connecting a Yamaha CL/QL console, RIO inputs, and Nuendo software for a live, multitrack recording setup.
While instructions vary slightly depending on which operating system you are using (Windows or Mac), both will require the same four pieces of software:
- Dante Virtual Sound Card
- Dante Controller *
- Yamaha Console Extension
- Nuendo Live V1.0 (with security dongle)
* NOTE: This is not a lesson on Dante set-up and Dante Controller. This tutorial assumes you are familiar with that.
Dante Virtual Soundcard
We will start by getting the Dante Virtual Sound Card (DVS) initiated. When you start up DVS you will get this screen:
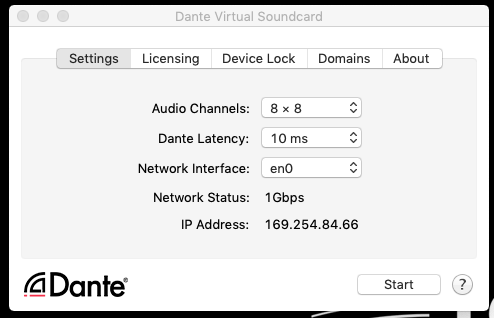 For the most part, you don’t need to change anything except for the Audio Channels. We recommend just doing the minimum that you need. In this example, we are using 32×32.
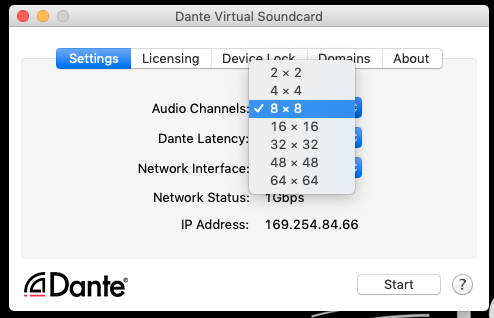 Once you have selected the channel count, hit “Start”. You can now close or minimize this window. DVS will continue to run in the background.
Dante Controller
In Dante Controller, be sure to subscribe (check mark) so that the inputs from the RIO (transmitters) are going to the Dante channels of your DVS Computer (Receivers). You can also record the direct outs of the console. Just be sure to turn those on! But usually you will want to record directly off of the pre-amps of the RIO.
CL/QL Integration
In order to allow the channel names and colors to transfer over to Nuendo, you will need to connect the computer to the Nuendo Live recording module on the CL/QL. This is why you need the Yamaha Console Extension installed on the computer.
On the console, below the metering section on the right-hand side of the screen, click “RECORDER”. On the top right of the screen you will see 2 tabs. Select the “NUENDO LIVE” The screen should like this:
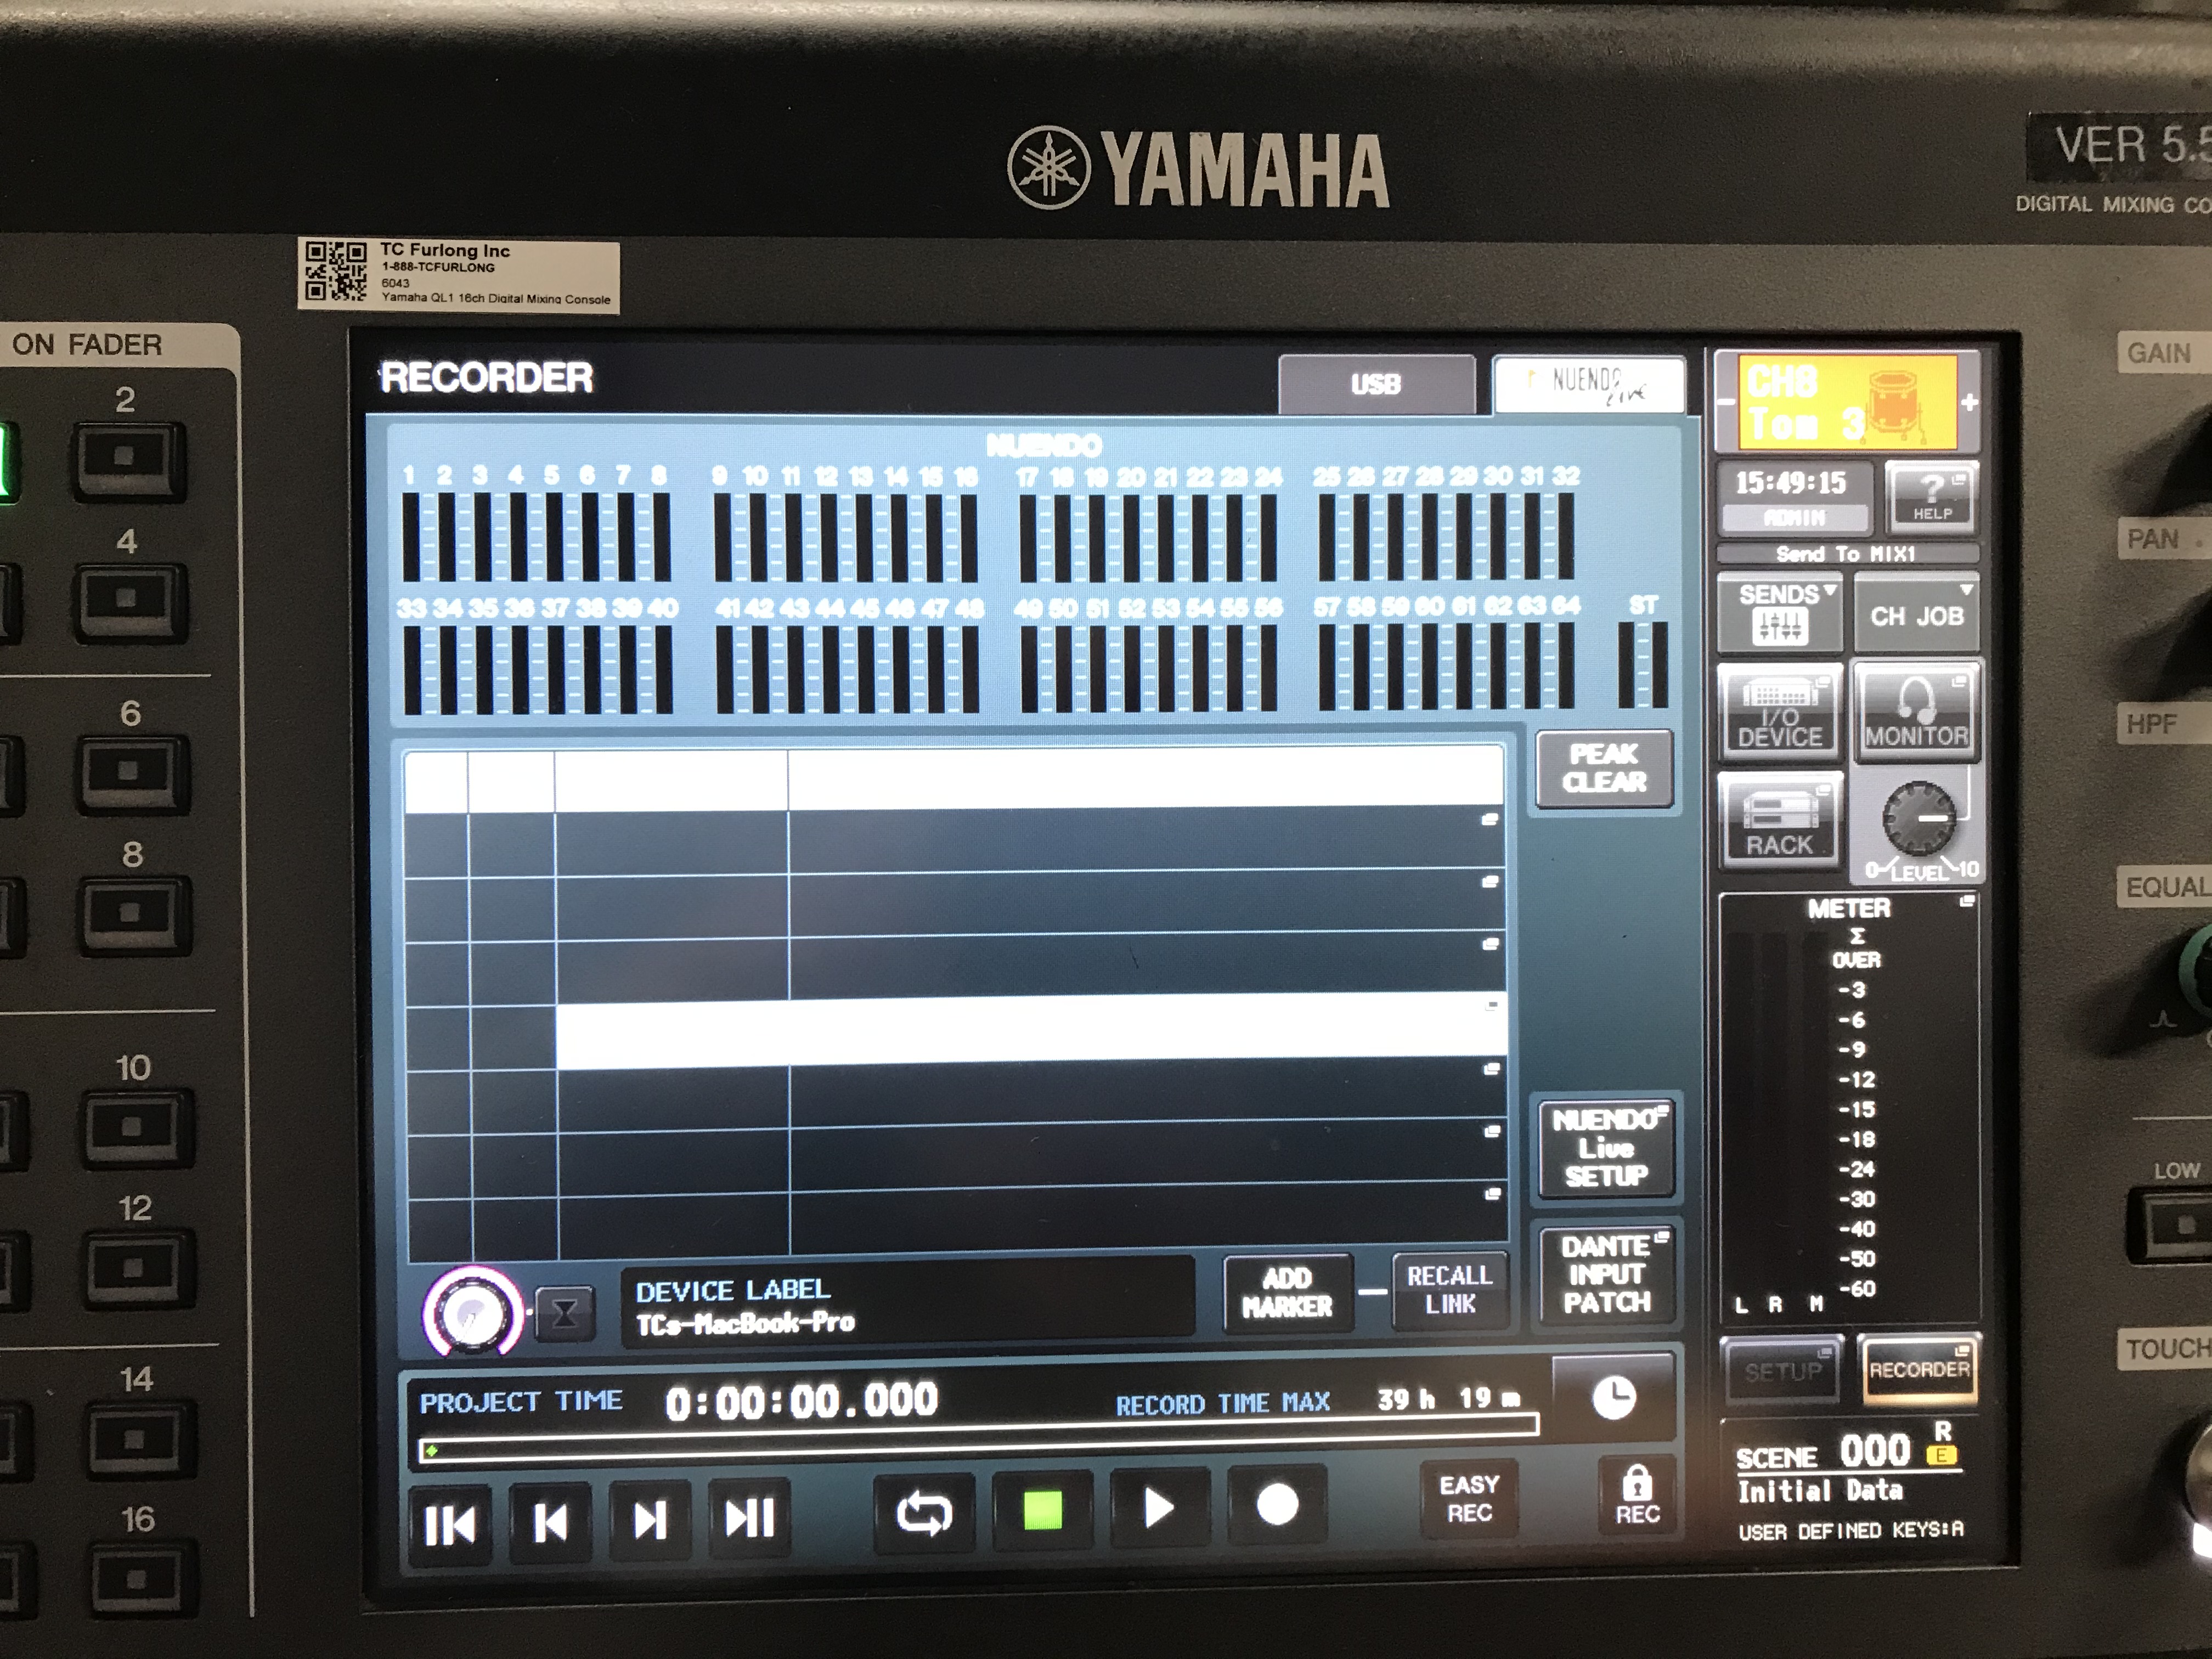
Next, select the “NUENDO LIVE SETUP” This will bring up this screen:
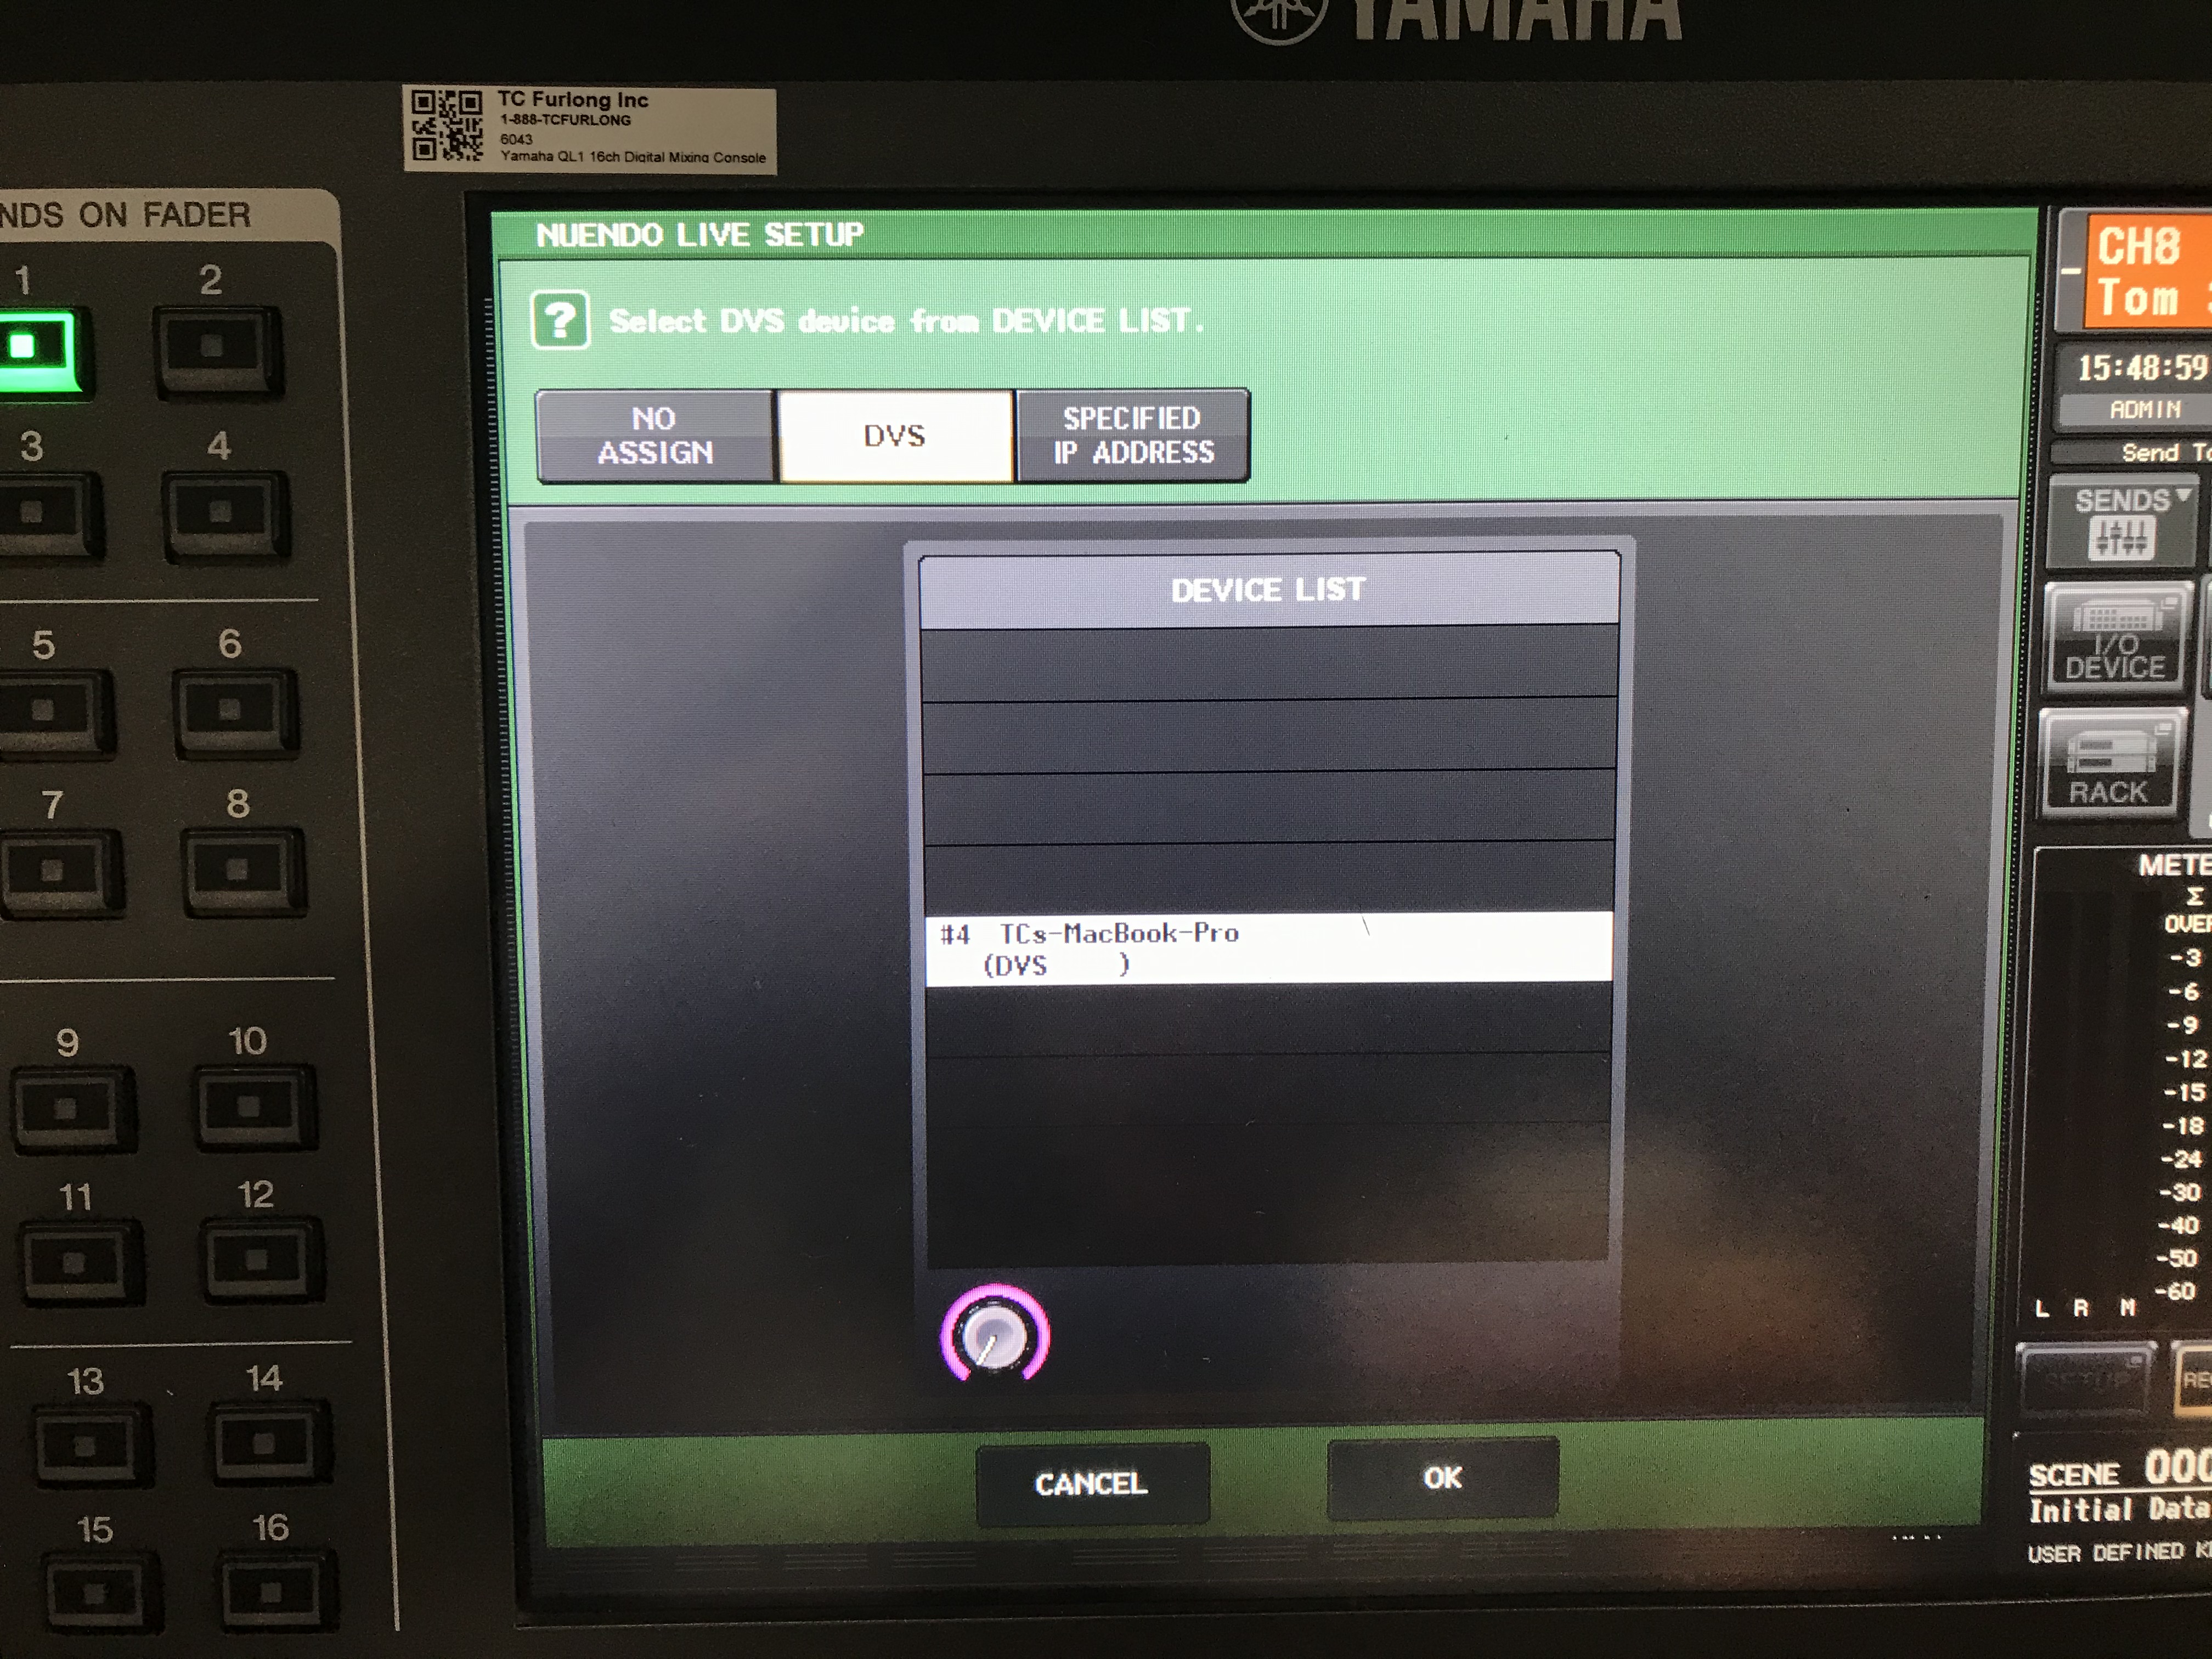
On the top, select “DVS”. If your computer is configured correctly for Dante and mounted as a device on your Dante network, you should see it displayed here. Select your computer and click “OK”.
Nuendo Live
When you launch Nuendo, it will ask you to select a new project or open an existing one. For this tutorial, click “New Project…”.
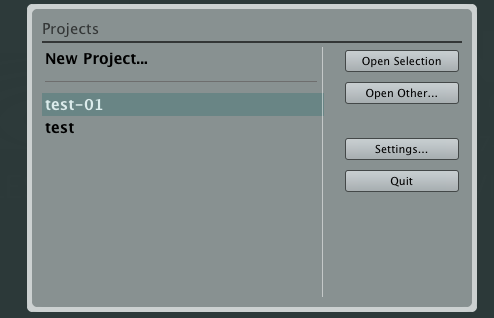
When that opens, you can click on the gear icon in the upper left-hand corner to get to the settings.
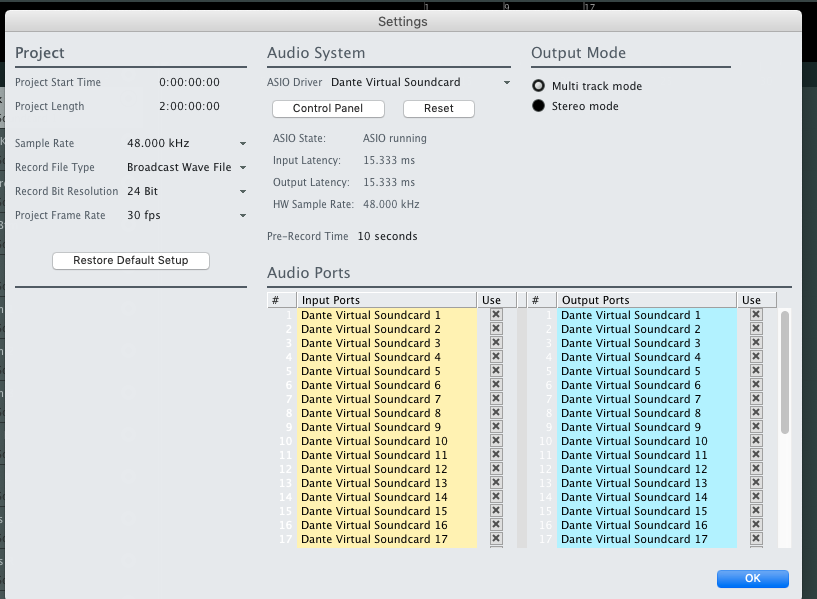
You will want to be sure that the ASIO driver selected under the Audio Systems header is the Dante Virtual Soundcard. We typically leave all the settings as default. (48kHz/24bit). If everything went as planned, you should see the screen above. Hit “OK”.
Now from the “Project” menu, select “Add Audio Tracks…”
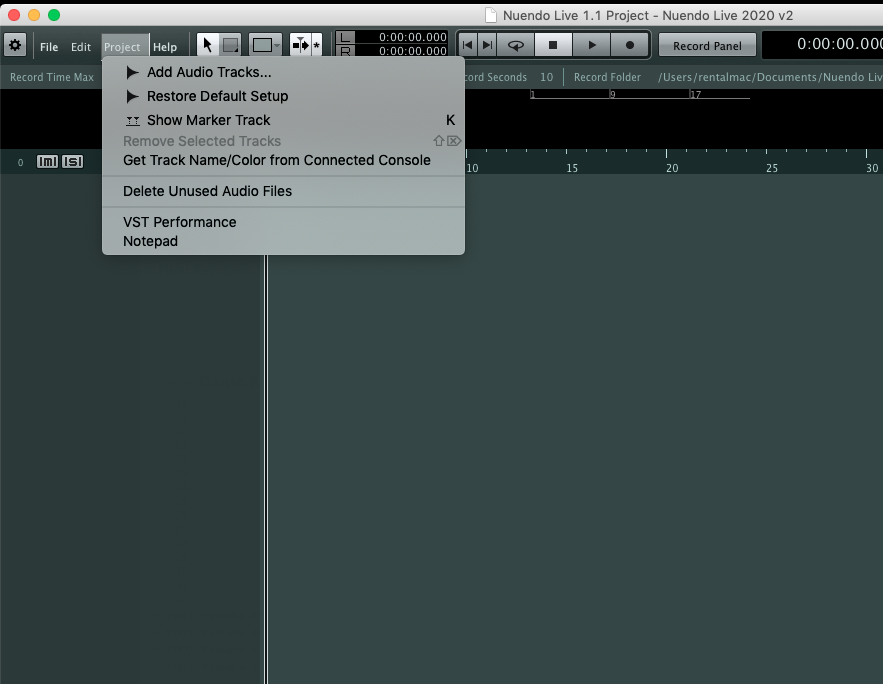
This is where you can select how many recording tracks you would like.
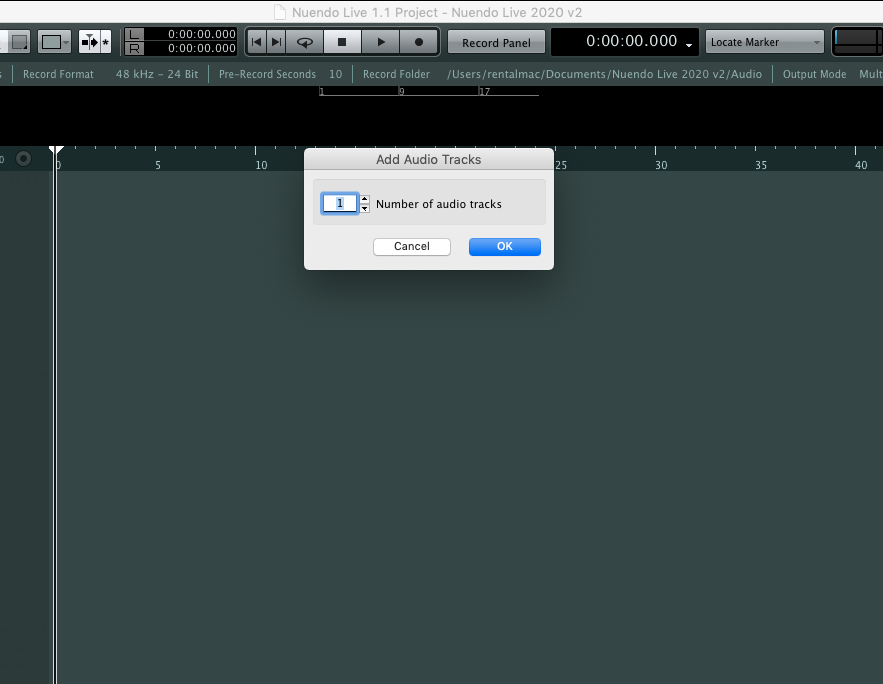
Select the number you need. In this example, I made 22 tracks. Then click “OK”.
Next, under the “Project” menu again, select the “Get Track Name/Color from Connected Console”.
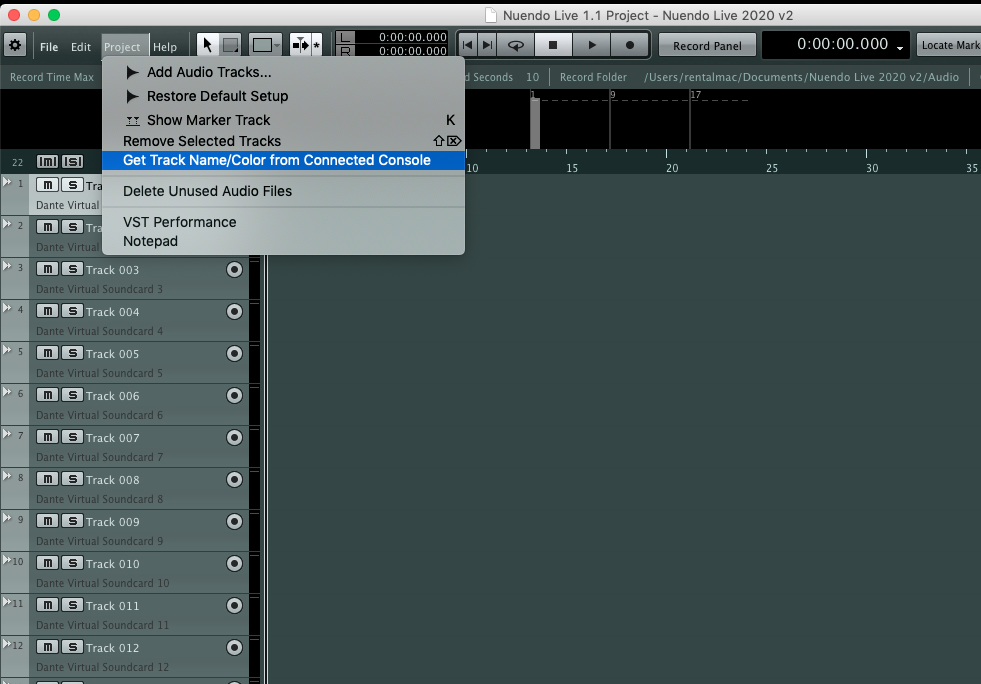
Now, if you have labeled your console with color ID tags and channel names before this step, they should all be populated now into your Nuendo Live project!
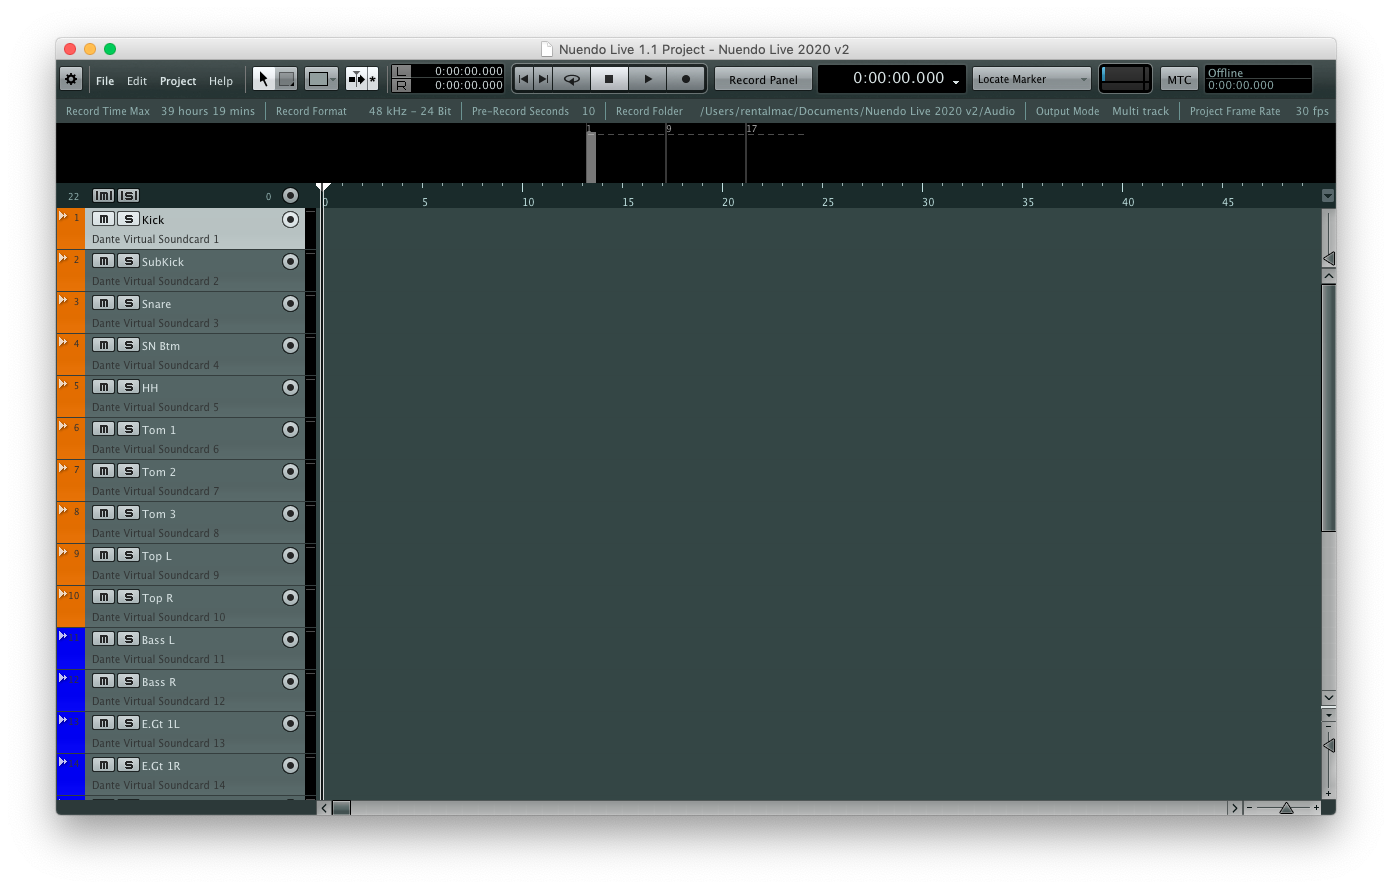
Now hit the record button!
Trouble-shooting (Mac)
If you have followed all the instruction and you still don’t have audio being recorded on your computer, try the following steps.
On your Mac: Go to System Preferences. Go to “Security and Privacy”. From there on the last tab, select “Privacy”.
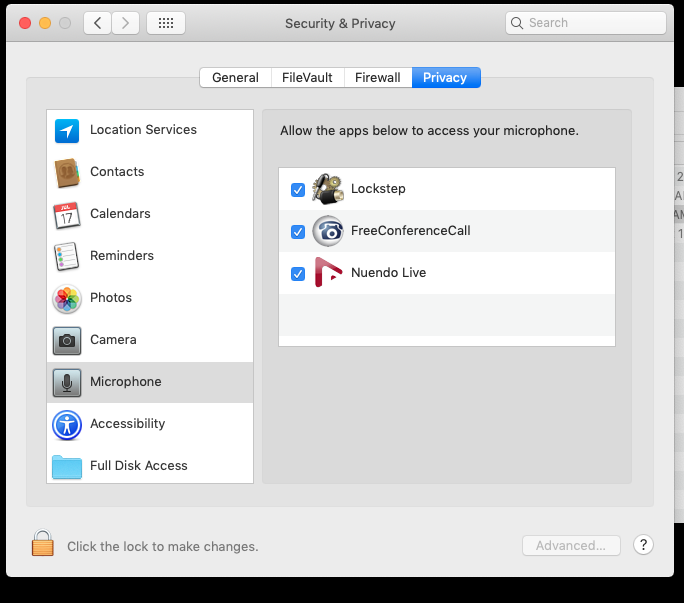
In the menu on the left, select “Microphone”. Make sure that Nuendo Live is checked to allow.
This is a strange step to remember since you may think it only applies to the built-in microphone of your computer, but it does matter! Now hopefully you are recording!
Yamaha’s CL and QL series are powerful consoles, and we hope these instructions help unleash the full multitrack recording capabilities of the desk. For any questions about this guide, or help troubleshooting your multitrack setup, call us at 847-367-9588. If you need assistance after business hours, please contact our 24/7 support line at 800-866-3875.
TC Furlong Inc. is an authorized dealer of Yamaha commercial products (including CL/QL consoles and Nuendo) contact our sales team sales@tcfurlong.com. We also maintain a fleet of Yamaha consoles, I/O devices, and interconnect in our well-maintained rental inventory. For a rental quote, contact our rental team at rentals@tcfurlong.com.