 by Matt Collera
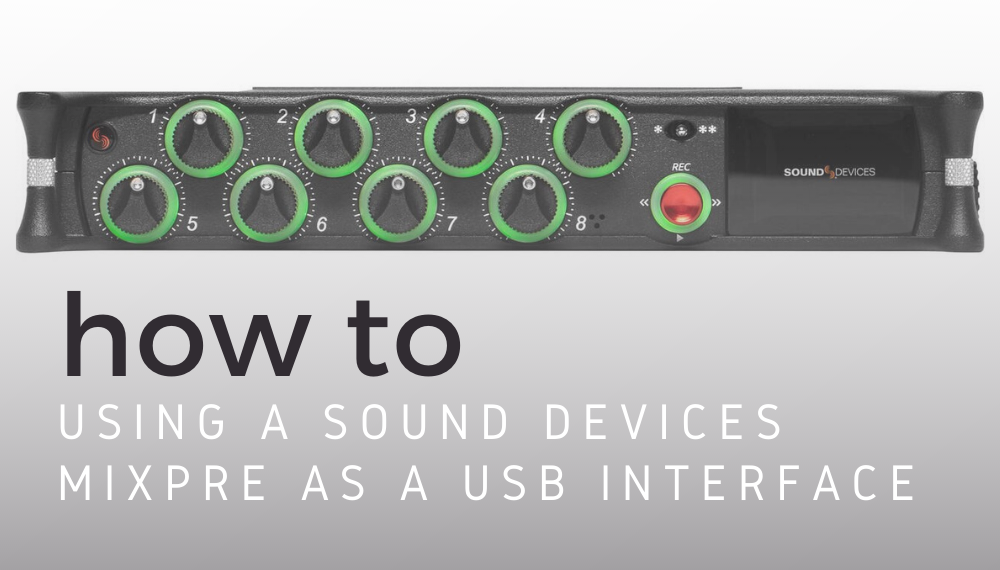
The MixPre series by Sound Devices are compact, versatile, and easy-to-use mixer-recorders for use in professional and personal settings. With the ultra-low noise Kashmir analog microphone preamps, anyone can record high-quality multitrack audio for their podcast, instrument tracking, or field recording session. But did you know MixPres can also be used as a USB interface for your computer?
A USB interface allows you to connect inputs (including XLR microphones or ¼” instrument jacks) to your computer as inputs for use in programs such as AVID Pro Tools, Adobe Audition, Zoom, OBS Studio, etc. In this blog, we’ll show you how to set up a MixPre-10T on a PC to listen to your computer sound through the device. Then, we’ll explain how to connect a microphone and use it in Open Broadcaster Software (OBS) Studio.
Out of the box, the Sound Devices MixPre series is USB 2.0 class-compliant, or plug-and-play, and will be recognized by Windows as a two-input (Channels 1 and 2), two-output (Left and Right) audio device, or 2×2. If you want to take full advantage of all 8 microphone preamps, download and install the latest ASIO driver at http://www.sounddevices.com/download/.
Connecting the MixPre-10T to a Windows PC
After powering up the device using your source of choice, (we recommend the XL-WPH3 from Sound Devices), connect the MixPre to your computer with a USB-C to USB-A cable.
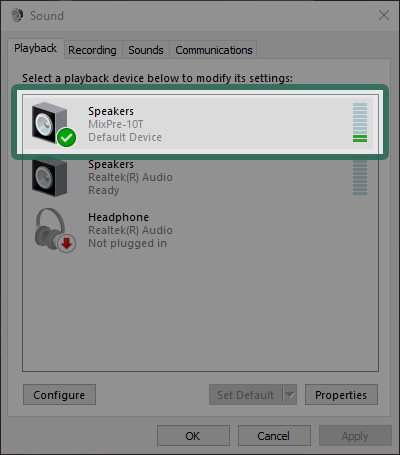
After booting up, Windows should automatically set up the MixPre-10T as a 2×2 interface. Check your Sound settings in the Control Panel (Start > Control Panel > Hardware and Sound) and confirm that the MixPre-10T is selected as both the default playback and recording device. If it’s not, select the MixPre-10T then click the ‘Set Default’ button towards the bottom of the window:

Now we need to make sure the sample rate and bit depth set by the MixPre-10T match what Windows is expecting. In the Playback tab, double-click the MixPre-10T. Next, click the ‘Advanced’ tab. Select ’24 bit, 44100 Hz (Studio Quality)’. Click ‘OK’ to confirm. If these values do not match, your computer’s sound will not playback correctly.

Monitoring Computer Audio through a MixPre-10T
Now that the PC is correctly recognizing the MixPre-10T, it’s time to route the two channels of Windows system audio (Left and Right output) through the MixPre-10T to your speaker and headphones.
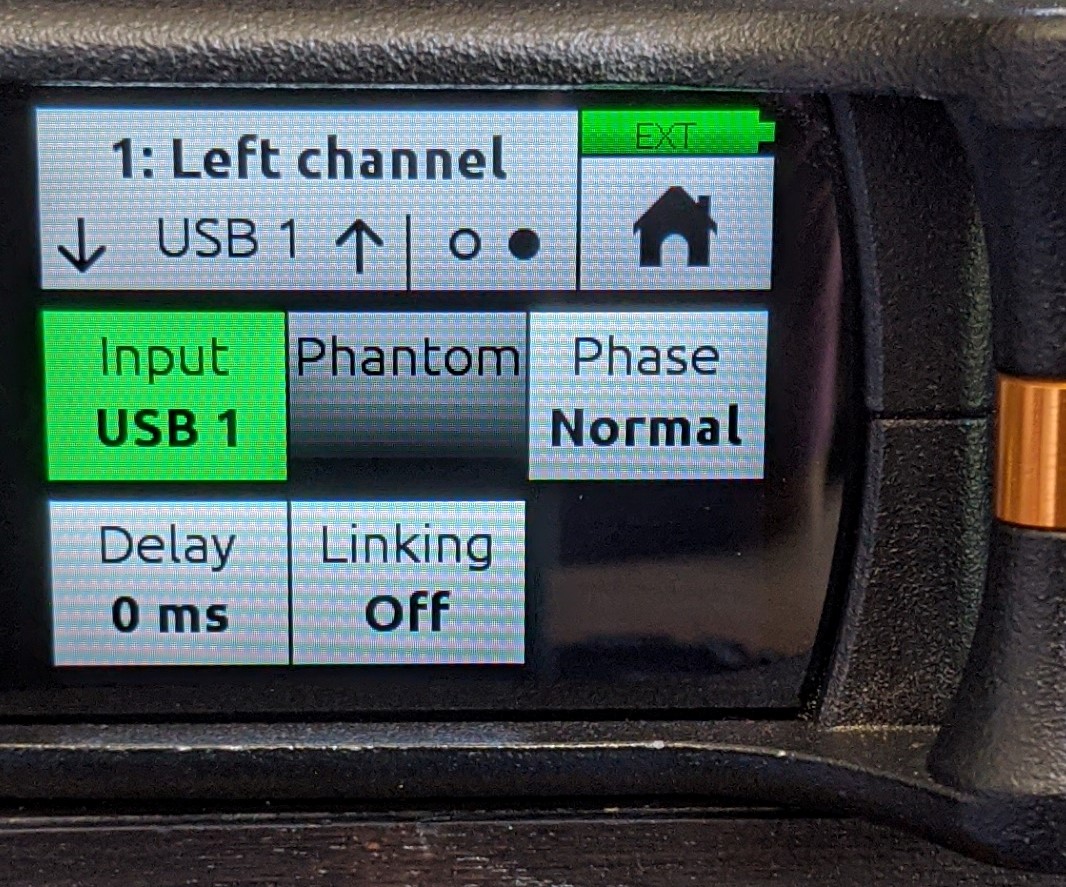
First, select which channel you would like the Left channel of computer audio (USB 1) to be patched. We recommend choosing Channels 1, 3, 5, or 7 as the Right channel (USB 2) be patched to the adjacent channel, e.g. 1-Left, 2-Right; 5-Left, 6-Right; etc. Set the input of this channel to USB 1.

Once you establish an input channel for the Left channel, activate 2-channel stereo linking on the second page of settings within that channel.
Because of channel linking, USB 2 will automatically be set as the input for the linked channel and its fader will be reassigned to control the panning of this stereo output.
Both channels of your computer’s audio are now routed to the MixPre-10T which can be outputted through a speaker and headphones.
Connecting a Microphone to Open Broadcaster Software (OBS) Studio
Open Broadcaster Software (OBS) is a popular open source video recording and live streaming program for both Windows and Mac. With a USB interface, not only can you use an XLR microphone to stream studio quality audio on services like Twitch and Facebook, you can also stream and mix multiple audio sources, e.g. a panel of six participants, a three piece band, etc.
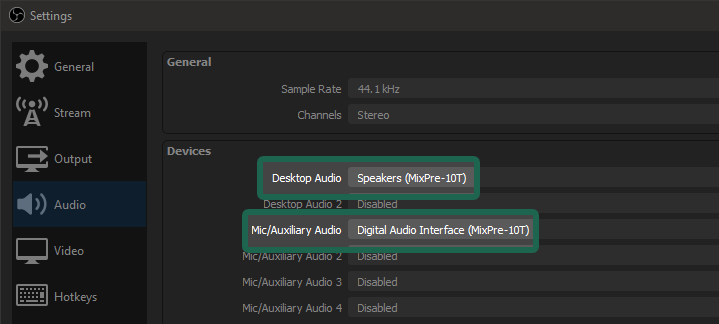
In OBS Studio, navigate to the Audio settings (File > Settings > Audio). Select ‘Speakers (MixPre-10T)’ in the Desktop Audio drop-down, and ‘Digital Audio Interface (MixPre-10T)’ for Mic/Auxiliary Audio. Since you confirmed both of these as the default device in a previous step, you can also simply select ‘Default Device’ for both of these options.

Also, while you’re on this page double-check that the Sample Rate that OBS is referencing is 44.1 kHz. Accept these changes by clicking OK.
Unless you are streaming a stereo microphone that feeds two channels into the MixPre-10T, your microphone audio is defaulted to a hard-left pan. To set up a single microphone input as a mono channel, navigate to the Advanced Audio Properties by right-clicking the Audio Mixer. Then, check the Mono box in the Mic/Aux row.
Test to see that OBS is recognizing your desktop audio and microphone by checking the metering bars in the Audio Mixer. If applicable, activate phantom power on your microphone input channel via the MixPre-10T.

Congrats! Your Windows PC is now set up to stream your microphone and desktop audio using OBS Studio.
For questions regarding similar USB interfaces such as the Sound Devices USBPre 2 in our rental stock, contact the Rental Team at rentals@tcfurlong.com. For questions about designing an audio streaming solution for your next project, contact the Sales Team at sales@tcfurlong.com.
For more technical tips, sign-up for our email newsletter!