Education

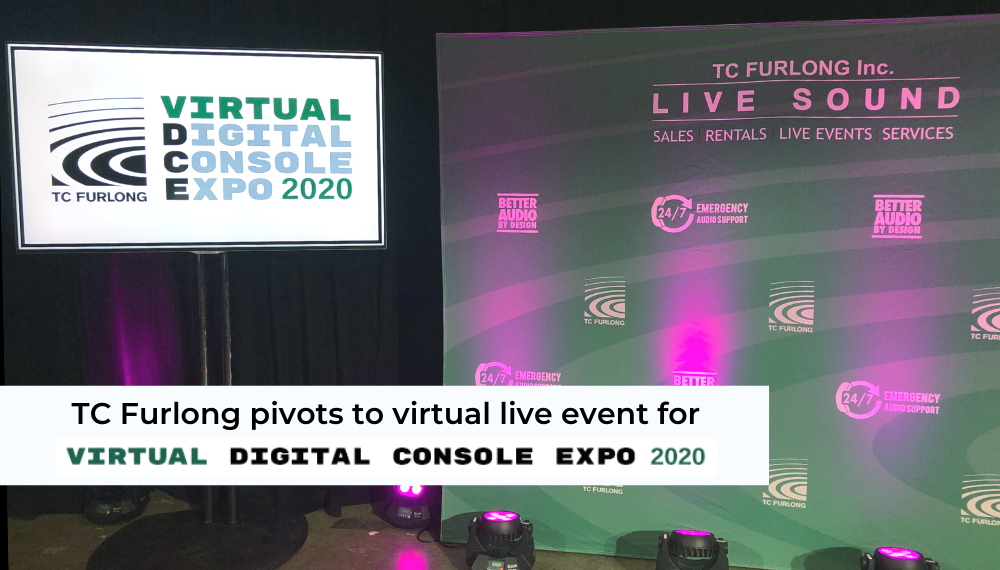
From December 1st – 3rd, TC Furlong Inc. hosted its 10th Annual Digital Console Expo as a three day virtual live event. This year’s Expo featured content from seven leading manufacturers of digital consoles, including Allen & Heath, AVID, DiGiCo, Lawo, Solid State Logic (SSL), Waves, and Yamaha.

The Digital Console Expo has traditionally been an in-person event, held each year at Moody Church in Chicago. When it became apparent that an in-person event would not be possible this year, we pivoted to using our experience in virtual and hybrid live event production to bring our Expo entirely online, with the goal of providing the same engaging and valuable experience attendees have come to expect from the events of years past.

A New Format

The Expo featured morning Main Session presentations by two or three of our manufacturer partners each day, followed by afternoon Breakout Q&A sessions, giving attendees the opportunity to engage in direct dialogue with presenters in a small group setting. Some manufacturers also presented additional Deep Dive webinar sessions in the evening each day.

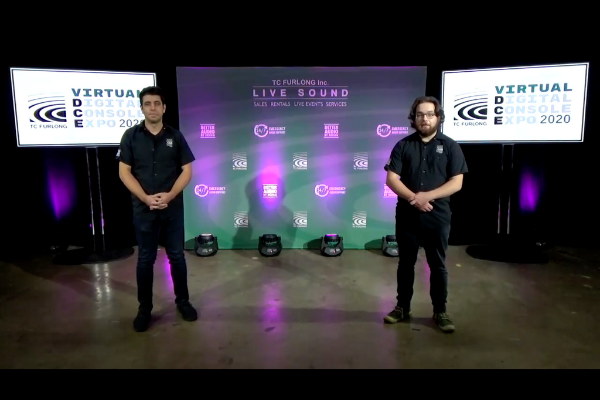
Each manufacturer’s Main Session segment consisted of a short, pre-recorded presentation, followed by a brief live segment with a member of the TC Furlong Sales & Marketing Team. Those who watched the Main Sessions live were eligible for a chance to win giveaway prizes from each of the manufacturers.

The Breakout Q&A Sessions were 30-minute, open format Zoom meetings. A virtual alternative to stepping into a manufacturer’s booth at an in-person Expo, the Q&A sessions were an opportunity for attendees to ask questions that weren’t addressed during the main presentations, and dig in to details about specific products.

The Expo also featured Deep Dive webinars from Allen & Heath and Lawo. Allen & Heath presented three webinars on their SQ Series, dLive Series, and Avantis consoles. Lawo’s Deep Dive focused on their mc2 Series of digital consoles.

All of the Main Session presentations and Deep Dive webinars were recorded, and are available for review on our YouTube channel.

Behind The Scenes

Switching to a virtual event this year was not only a hurdle for the format of the event, it also presented a challenge to the TC Furlong Live Events team, who were tasked with putting together the entire production. The annual trade show-style, live event at Moody Church has always been a TC Furlong team effort, but this year’s event was truly an interdepartmental project with the necessary video, audio, lighting, and overall event production all being handled in-house at the Lake Forest, IL office.

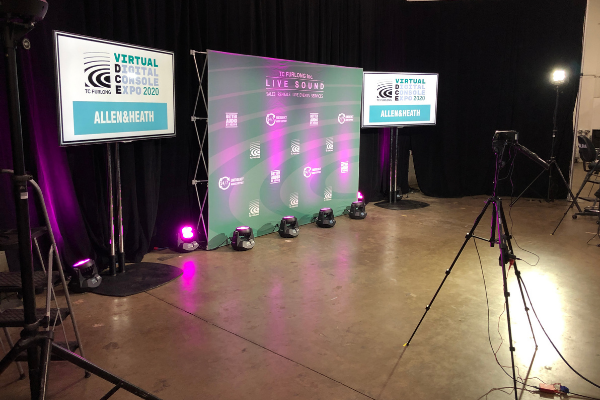
The first step was designing the office layout including the presentation set, the video playback/control, and audio control suites in a safe and pandemic-responsible setup. To allow for appropriate social distancing measures, the set for the shoot was located in one of our warehouse spaces, while video switching, technical direction, and audio mixing took place in separate office spaces throughout the building. All of these spaces were tied together with the necessary cabling for audio/video I/O and each location had a multi-view monitor setup to see what was happening all over the office.

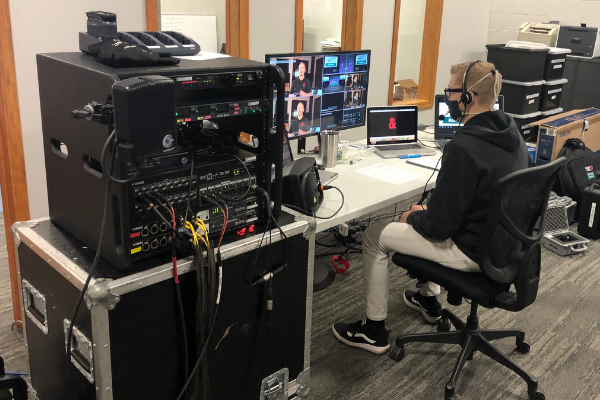
Technicians were using FreeSpeak II wireless intercom to stay connected and had a separate intercom channel dedicated to stage announce/aux inputs to talk to and hear back from the hosts of the event on-set.  Audio for the program and other matrix outputs was mixed in our front lobby, and playback and Zoom audio returns were routed through monitors at each technician’s work area and into the in-ear monitors of the on-screen hosts.

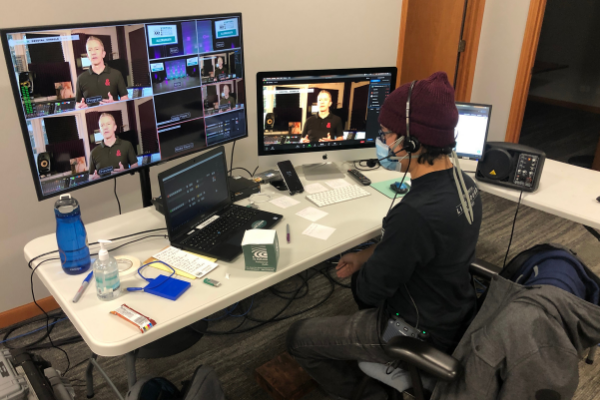
The multi-camera shoot was routed to a video switcher in the office where a technician was able to handle switching duties.  Video playback of manufacturer presentations was handled locally, while manufacturers joined us live via Zoom from across the country.

While we weren’t able to gather in person for this year’s event, we’re proud that we were able to provide much of the same great educational content and opportunities for conversation via a virtual alternative. We’d like to extend our thanks to our manufacturer partners, and everyone who attended, and we look forward to welcoming everyone to our next Digital Console Expo in 2021!

TC Furlong Inc. is proud to be an authorized dealer for the manufacturers featured at this year’s Expo. To request a quote, or more information about any of the featured products at this year’s show, reach out to our Sales Team at sales@tcfurlong.com or call 847-367-9588.

We also carry many of the brands featured at the Expo in our rental inventory. To learn more about renting a digital console, or anything else in our extensive rental inventory, reach out to our Rental Team at rentals@tcfurlong.com or call 847-367-9588.

Is your organization looking to host a virtual or hybrid live event? TC Furlong Inc.’s Live Events team can provide a full AV production solution for your next event. Contact Jeff Cech at jc@tcfurlong.com to get started.

What does a direct box (or “DI”) actually do? What are the differences between passive and active DI’s? Which one is the best for my source? It’s well understood that direct boxes are an essential part of any stage package. However, as technicians, we probably put less thought into them than any other part of our signal chain. For a lot of us, the DI might just be a “magic box” that we know we’re supposed to use, but aren’t quite sure why. In this article, we’ll explore the basics of direct boxes, and give you some simple guidelines for using them.

What Does a DI Do?

Put simply, a DI is a device that takes a signal from a source, and adjusts it to the parameters your mixer or stagebox’s preamp will be happy with; namely a balanced, mic level, low impedance signal. To illustrate, let’s look at one of the most common sources that we use a DI with: the electric bass guitar.

The signal output from an electric bass is high impedance and unbalanced. The high output impedance means the signal will degrade quickly over a long cable run. Likewise, unbalanced cables are extremely susceptible to RF interference. For this reason, unbalanced cable runs should be kept as short as possible. A direct box will take the incoming signal, and convert it to a low impedance, balanced signal. The result? You can run a long XLR cable to your stagebox or console, without worrying about signal degradation or interference.

For another example, let’s consider a line level source, maybe an electric keyboard, CD player or other playback device. While there are a couple different standards for line level, both operate at an exponentially higher voltage than mic level, which will overload your mic preamp. A direct box steps down the voltage from a line level source, and again, outputs a balanced signal, which your preamp will accept.

Most DI’s have an input pad to attenuate particularly hot incoming signals, a ground lift to deal with any pesky hums, and a throughput (typically labeled “THRU”) to feed an instrument’s unaltered signal to the musician’s amplifier. Your DI might also have a polarity switch; if you’re running an instrument through a DI, and also have a mic on that instrument’s amp, it can be worthwhile to flip that polarity switch and listen to determine which setting sounds better.

Passive VS Active

Broadly speaking, there are two categories of direct box that achieve the described results in two different ways: passive direct boxes, and active direct boxes. Passive DI’s employ a transformer for impedance matching and balancing, while active DI’s use a preamplifier circuit. Active DI’s require a source of power – almost always 48V phantom power from the mixer. So, which should you use for any given source?

As a general rule of thumb, active direct boxes should not be used with devices that have “active” outputs – line level sources, like the keyboard described above. There’s no need to boost the strong line level input, so using an active DI would amount to introducing an unnecessary gain stage, and raising the noise floor in our signal chain.

Conversely, active DI’s can be hugely beneficial when dealing with particularly low signal levels from “passive” sources, like the electric bass we talked about earlier. While it will probably sound fine through any modern passive DI, the active DI’s preamplifier circuit can give the bass a little bit of a lift.

Conclusion

There are countless direct boxes on the market today. Maybe you need to plug in a phone or laptop for playback. Perhaps you’re looking for a DI to color (or even “colour”) your instrument’s sound to evoke vintage gear. Or, maybe you need a streamlined way to plug in multiple keyboards with stereo outputs. Our extensive rental inventory includes direct box options for all of the above, plus a lot more. Give our Rental Team a call at 847-367-9588, or email them at rentals@tcfurlong.com to make sure you have the right selection of DI’s on your next gig.

We’re also authorized dealers for all major professional audio manufacturers. For a purchase quote on a DI, or any other gear you may need, reach out to our Sales Team at sales@tcfurlong.com or call 847-367-9588.


For more technical tips, sign-up for our email newsletter!

by Scott Helmke

Disclaimer: Extreme care should be taken with electricity. A/C voltages have the potential to cause serious harm, or even kill. The advice and guidance provided in this article cannot fully anticipate or predict the situations you may experience on a show site. 

Something that we all depend on in the sound industry, but don’t always think about, is the need for a reliable source of electricity at a show site.  On the one hand it’s almost always available, but on the other hand unreliable power can ruin a show with “mysterious” hums, buzzes, and equipment failures, or even injure and kill people.  This article is about basic tools and tests to protect yourself, other people, and your gear from miswired or otherwise dangerous electrical outlets.

Here’s what the standard USA power receptacle looks like:

The “hot” connection should have an AC voltage in the range of roughly 115-125 volts.  The other two connections should both have zero AC volts present.  All the current that goes through the receptacle should only pass between the neutral and hot connections.  The ground, better known as “safety ground”, is there to safely drain away any stray current that might result from defective or damaged equipment. 

If any of these connections are wired incorrectly or not connected, bad things can happen. Even if the venue insists that “nobody else has had a problem with it”, it will still be a safety hazard.

Voltmeter

A voltmeter or digital multimeter (also known as DMM or VOM) is an essential tool for troubleshooting electrical systems. The first thing I do before plugging in any equipment at a venue is use a voltmeter to check that the wiring is correct.  I do this for every outlet I’m planning on using, if it’s my first show in a venue or if I haven’t been there recently.  It’s always possible that somebody came along and “fixed” an outlet the wrong way. Note that most voltmeters or digital multimeters are rated to handle 120 volts AC, but you should always verify that the model being used is properly rated (here’s an article that discusses voltmeter ratings).

I measure between hot and neutral for around 120 volts AC, and I measure between ground and neutral to make sure the voltage is less than 0.5 volts.  I also measure between hot and ground for around 120 volts, to make sure that the ground is actually connected.  The final test is to measure between hot and anything I can find nearby that will be grounded – maybe even just poking the test lead against a concrete floor.  I want to make sure that the hot connection is actually “hot”, because sometimes a miswired outlet can have that backwards – a very dangerous situation (here’s a great article that explains the deadly ReverseBootleg Ground miswiring).

Three-Light Outlet Tester

You can also use a three-light outlet tester to do this basic wiring check, although it’s not as thorough as using a voltmeter as described above.  These testers are good for quickly checking many outlets for basic wiring problems, but they will not catch certain types of wiring mistakes (again see Reverse Bootleg Ground article above).

Non-Contact Voltage Tester

One type of electrical tester that everybody should own is a Non-Contact Voltage Tester, aka NCVT.  This is a clever little device that can identify the presence of high voltage (typically anything over 40V) without having to be connected.  Some have the tip shaped to fit into outlet slots, but they can also be used to quickly check if any object or surface is carrying a voltage. Old “vintage” guitar amps are notorious for having dangerous voltages present, for instance. This is also the best way to test for the dangerous Reverse Bootleg miswiring, by inserting into the ground pin of an outlet.

Non-Contact Voltage Testers are now available for $10-25 at most hardware stores and big-box home improvement stores, and I consider them a necessary piece of safety gear to bring to every show I work.  At TC Furlong we include one in every adapter kit we send to shows, along with a voltmeter.

Kill A Watt Meter

A final piece of test equipment that I’ve found very useful is a “Kill a Watt” meter.  This is a little device that lets you easily measure the power used by a piece of electrical equipment.  Very handy for figuring out what your gear really draws, which is often much less than the sticker on the back would indicate.  Very handy for figuring out how many separate power outlets (on different circuits) you really need for a show.

Always exercise caution when you are operating any of these tools, and make sure that you are being as safe as possible while searching for miswirings or bad outlets. Not only can these preventative measures avoid possible injury, but you may also find problems that could cause equipment issues or just bad sound. You can never be entirely sure what you’ll find at any given venue, but proper use of the tools described in this article should uncover underlying issues before they have a chance to ruin your show.

The TC Furlong Inc. team has the equipment and expertise to safely support your next live event. Get in touch with one of our Project Managers by calling 847-367-9588.

For more technical tips, sign-up for our email newsletter!

By Scott Helmke

I am very happy to be able to report on the latest version of Meyer’s MAPP (Multi Acoustic Prediction Program), MAPP 3D.  Meyer’s extremely accurate and reliable speaker system design and prediction software originally developed more than 20 years ago, now in a 3-dimensional version.  Currently in pre-release, general release of this software is scheduled for August 19, 2020.

I’ve been using the previous 2D versions of this software to simulate various concert setups and determine the best choice of loudspeakers and how to deploy them.  Many high-end loudspeaker companies have prediction software, but Meyer’s MAPP has stood out for years because of the extremely high accuracy and resolution of their speaker data and prediction software.  Needless to say, being able to produce a trustworthy loudspeaker deployment is extremely useful.  And now, the ability to predict loudspeaker coverage and SPL in a 3-dimensional space makes it even better.

Going 3D

The earlier versions of MAPP allowed you to place virtual Meyer loudspeakers, individuals or in arrays, into two-dimensional projects in either a side or overhead view of a venue.  For a theatre with angled seating areas you would use a side view, putting in lines to represent seating areas and using the software to predict relative volume and frequency response over those areas. Another design might use an overhead view to make sure the proposed loudspeaker system covered as well across the seating areas as well as up and down. MAPP 3D allows you to work in a CAD-like 3-dimensional space, placing objects within the 3D planes to represent seating/architecture, loudspeaker systems, and surfaces designed as prediction areas. The software will then show the spectrum of SPL levels as a color gradient across the prediction areas.

System Example

The simulated venue and loudspeaker system shown here is from an annual theatrical fundraising gala, usually produced in a hotel ballroom consisting of three spaces linked by airwalls.  Speaker hanging locations are limited to airwall tracks in the ceiling, including one extra track that runs down the center of the middle section.  The goal is even coverage over the seating area (many large round tables), with minimal spill onto the thrust stage.  I’ve actually set the prediction plane to be a surface four feet above the floor, to approximate how it will sound to the average person sitting down.  I was even able to move my virtual measurement microphone around to set delay times between speakers, saving time during setup.

Galileo and SIM3 Emulation

Since you wouldn’t deploy a large speaker system in the real world without a speaker processor, MAPP 3D allows you to do just that in the virtual system as well.  Speakers can be assigned to outputs of a virtual Galaxy processor, and all of the signal processing can be applied to the simulated response – ultimately you could send those settings to a real processor before even loading the truck, and have a great starting point for tuning the speaker system in the actual venue. It’s also possible to put one or more measurement “microphones” into the 3D area and see a simulated Meyer SIM3 frequency and phase response display. 

Additional Features

While the MAPP 3D software provides basic 3D CAD functionality for putting in simple shapes and prediction areas, it also allows 3D CAD files in DXF and Sketchup formats to be imported.  It is still necessary to define prediction surfaces, but having the actual architecture to use as a reference will save a lot of time and also allow a better-looking output.  There are also advanced tools such as a line array auto-splay tool to help quickly set angles between line array elements.

Like previous versions of MAPP, rigging weights and information is included to make sure that designs are safe to hang.  A new addition is predicted power consumption, which is a very handy feature.

Local Machine

Finally, one really big change in MAPP 3D is that an active network connection is no longer needed for predictions.  Modern computers are now fast enough to do this processing, and you can choose which loudspeaker models to download data for.  Each loudspeaker model file is about 127Mb (seriously high resolution!), so being able to choose which models to keep helps preserve disk space. 

Conclusion

MAPP 3D is a wonderful upgrade to Meyer’s MAPP software, adding even more functionality as well as being able to work in three dimensions.  As I write this article, the software is still in pre-release and they are still ironing out a few bugs, but otherwise it’s quite nice to use.  Having some basic background in 3D modeling software would be helpful to have, but aside from that it’s still familiar to anybody who has used MAPP software in the past.


MAPP 3D is scheduled for public release on August 19, 2020.  TC Furlong is a longstanding Meyer Sound dealer.  For any questions about Meyer’s MAPP 3D prediction software or any other Meyer products, reach out to our sales team at 847-367-9588 or sales@tcfurlong.com

If you are interested in adding Meyer Sound equipment to your next show or rental, get in touch with our Rental Team at 847-367-9588 or rentals@tcfurlong.com.


by Matt Collera

The MixPre series by Sound Devices are compact, versatile, and easy-to-use mixer-recorders for use in professional and personal settings. With the ultra-low noise Kashmir analog microphone preamps, anyone can record high-quality multitrack audio for their podcast, instrument tracking, or field recording session. But did you know MixPres can also be used as a USB interface for your computer?

A USB interface allows you to connect inputs (including XLR microphones or ¼” instrument jacks) to your computer as inputs for use in programs such as AVID Pro Tools, Adobe Audition, Zoom, OBS Studio, etc. In this blog, we’ll show you how to set up a MixPre-10T on a PC to listen to your computer sound through the device. Then, we’ll explain how to connect a microphone and use it in Open Broadcaster Software (OBS) Studio.

Out of the box, the Sound Devices MixPre series is USB 2.0 class-compliant, or plug-and-play, and will be recognized by Windows as a two-input (Channels 1 and 2), two-output (Left and Right) audio device, or 2×2. If you want to take full advantage of all 8 microphone preamps, download and install the latest ASIO driver at http://www.sounddevices.com/download/.

Connecting the MixPre-10T to a Windows PC

After powering up the device using your source of choice, (we recommend the XL-WPH3 from Sound Devices), connect the MixPre to your computer with a USB-C to USB-A cable.

After booting up, Windows should automatically set up the MixPre-10T as a 2×2 interface. Check your Sound settings in the Control Panel (Start > Control Panel > Hardware and Sound) and confirm that the MixPre-10T is selected as both the default playback and recording device. If it’s not, select the MixPre-10T then click the ‘Set Default’ button towards the bottom of the window:

Now we need to make sure the sample rate and bit depth set by the MixPre-10T match what Windows is expecting. In the Playback tab, double-click the MixPre-10T. Next, click the ‘Advanced’ tab. Select ’24 bit, 44100 Hz (Studio Quality)’. Click ‘OK’ to confirm. If these values do not match, your computer’s sound will not playback correctly.

Monitoring Computer Audio through a MixPre-10T

Now that the PC is correctly recognizing the MixPre-10T, it’s time to route the two channels of Windows system audio (Left and Right output) through the MixPre-10T to your speaker and headphones.

First, select which channel you would like the Left channel of computer audio (USB 1) to be patched. We recommend choosing Channels 1, 3, 5, or 7 as the Right channel (USB 2) be patched to the adjacent channel, e.g. 1-Left, 2-Right; 5-Left, 6-Right; etc. Set the input of this channel to USB 1.

Once you establish an input channel for the Left channel, activate 2-channel stereo linking on the second page of settings within that channel.

Because of channel linking, USB 2 will automatically be set as the input for the linked channel and its fader will be reassigned to control the panning of this stereo output.

Both channels of your computer’s audio are now routed to the MixPre-10T which can be outputted through a speaker and headphones. 

Connecting a Microphone to Open Broadcaster Software (OBS) Studio

Open Broadcaster Software (OBS) is a popular open source video recording and live streaming program for both Windows and Mac. With a USB interface, not only can you use an XLR microphone to stream studio quality audio on services like Twitch and Facebook, you can also stream and mix multiple audio sources, e.g. a panel of six participants, a three piece band, etc.

In OBS Studio, navigate to the Audio settings (File > Settings > Audio). Select ‘Speakers (MixPre-10T)’ in the Desktop Audio drop-down, and ‘Digital Audio Interface (MixPre-10T)’ for Mic/Auxiliary Audio. Since you confirmed both of these as the default device in a previous step, you can also simply select ‘Default Device’ for both of these options.

Also, while you’re on this page double-check that the Sample Rate that OBS is referencing is 44.1 kHz. Accept these changes by clicking OK.

Unless you are streaming a stereo microphone that feeds two channels into the MixPre-10T, your microphone audio is defaulted to a hard-left pan. To set up a single microphone input as a mono channel, navigate to the Advanced Audio Properties by right-clicking the Audio Mixer. Then, check the Mono box in the Mic/Aux row.

Test to see that OBS is recognizing your desktop audio and microphone by checking the metering bars in the Audio Mixer. If applicable, activate phantom power on your microphone input channel via the MixPre-10T.

Congrats! Your Windows PC is now set up to stream your microphone and desktop audio using OBS Studio.

For questions regarding similar USB interfaces such as the Sound Devices USBPre 2 in our rental stock, contact the Rental Team at rentals@tcfurlong.com. For questions about designing an audio streaming solution for your next project, contact the Sales Team at sales@tcfurlong.com.

For more technical tips, sign-up for our email newsletter!